21st Century Teaching and Learning

In each session, we will focus on one 21st century teaching method or learning strategy. Then, each month, in a seminar format, one group of teachers will collaboratively present a lesson to the larger group, demonstrating use of the strategy in the classroom setting. You can read the details about the class, and how to sign up here:  https://docs.google.com/open?id=0B0_S7ee2sHDBODloeFBqM2lNOTA
Come join us!
Now for the tech tip....
With all the talk about flipping classrooms, and making our class presentations / content available beyond the classroom walls, wouldn't it be great if there was a simple, one-button way to narrate and record a presentation - like a powerpoint - from our computers? There is: 
With Screencast-O-Matic, there is no big file to download and install, nothing you need to do beforehand - not even register, if you don't want to... and it's totally free! Here's what to do - this video shows how simple the tool is to use...
Here are the basic steps, spelled out:
First, have the presentation or website you want to narrate open - if it's a Powerpoint, just have Powerpoint running, if it's an online presentation, have the presentation (or whatever it is you are looking to narrate) open in another tab in your browser.

Next, on another tab, go to screencast-o-matic.
You'll see something like this:
The "Start Recording" button is towards the top right.

Once you click the button, you'll see this screen...

And then you might be prompted to run the actual little program from their website. Just click "run."
 This will give you the recording tool. The dotted line is the actual area you will record - you can adjust the size to any size you need. If you click on a different tab, or minimize your browser window, you'll still see the box - it will record whatever is on your screen, inside the box, as long as you don't close the Screencast-o-matic tab itself.
All you need to do now is plug in a microphone (if you have one) and hit that little red record button at the bottom of the dotted box. Pause when you want to pause, and preview it when you're done.

Once you are done, all you need to do is choose how to publish it, give it a title and a description, and you're done! Share the link with your students, and they can view it at any time.
The "Start Recording" button is towards the top right.

Once you click the button, you'll see this screen...

And then you might be prompted to run the actual little program from their website. Just click "run."

All you need to do now is plug in a microphone (if you have one) and hit that little red record button at the bottom of the dotted box. Pause when you want to pause, and preview it when you're done.

Once you are done, all you need to do is choose how to publish it, give it a title and a description, and you're done! Share the link with your students, and they can view it at any time.

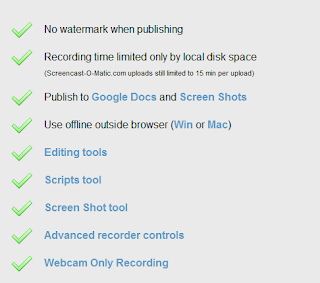
Looking to do more with it? For 15 dollars a YEAR, you get a lot more features - you can create videos of any length and save them to your hard drive (the free version allows 15 minute-long videos), you can publish to Google Docs, and do a lot more editing...
Here is a webcast I created using this tool:
SO... give it a try -- and let us know what you think!
No comments:
Post a Comment